🚀📅 Day 43 DevOps Challenge - Your AWS CI/CD Journey: Unveiling CodeDeploy 🚀 ☁

Passionate software engineering student | DevOps enthusiast | Seeking innovation and excellence in software engineering! 👨💻
Welcome back to the third installment of our series on creating a seamless CI/CD pipeline on AWS. In the previous parts, we covered setting up AWS CodeCommit and CodeBuild to manage your source code and build artifacts. Today, we're diving into the next set of tools and services vital for a robust CI/CD workflow: CodeDeploy, CodePipeline, and S3. 🚀
What is CodeDeploy? ☁
AWS CodeDeploy is a pivotal deployment service offered by Amazon Web Services that streamlines the process of application deployments. It allows for automated deployments to various targets such as Amazon EC2 instances, on-premises servers, serverless Lambda functions, or Amazon ECS services.
CodeDeploy facilitates the deployment of application content stored in Amazon S3 buckets, GitHub repositories, or Bitbucket repositories. Furthermore, it supports the deployment of serverless Lambda functions, making it versatile and adaptable to different application architectures. The best part? You don't need to modify your existing code to integrate CodeDeploy into your deployment process. 🌐
Now, let's explore how CodeDeploy can enhance your CI/CD pipeline. 🚀
Streamlining Deployment with CodeDeploy 🔄
AWS CodeDeploy offers several advantages when integrated into your CI/CD pipeline:
1. Automated Deployments 🤖
CodeDeploy automates the deployment process, saving you time and reducing the possibility of human error. Once your build is ready, CodeDeploy takes over and ensures a smooth deployment to your specified targets.
2. Easy Rollbacks ↩️
In case of any issues with a deployment, CodeDeploy allows for seamless rollback to a previous, stable version. This ensures that you can quickly revert to a working state if any problems arise during deployment.
3. Deployment Configurations 🛠️
CodeDeploy lets you define various deployment configurations, enabling you to customize deployment strategies according to your application's needs. Whether it's a blue-green deployment, in-place deployment, or a canary release, CodeDeploy provides the flexibility to choose the right strategy for your scenario.
4. Integration with Multiple Sources 🔄
CodeDeploy supports various sources for application content, including Amazon S3, GitHub, and Bitbucket. This flexibility allows you to maintain your code in a repository of your choice and deploy directly from there.
Task-01 :
Deploy index.html file on EC2 machine using nginx
- For code commit and code build steps, please follow Day 42 task article.
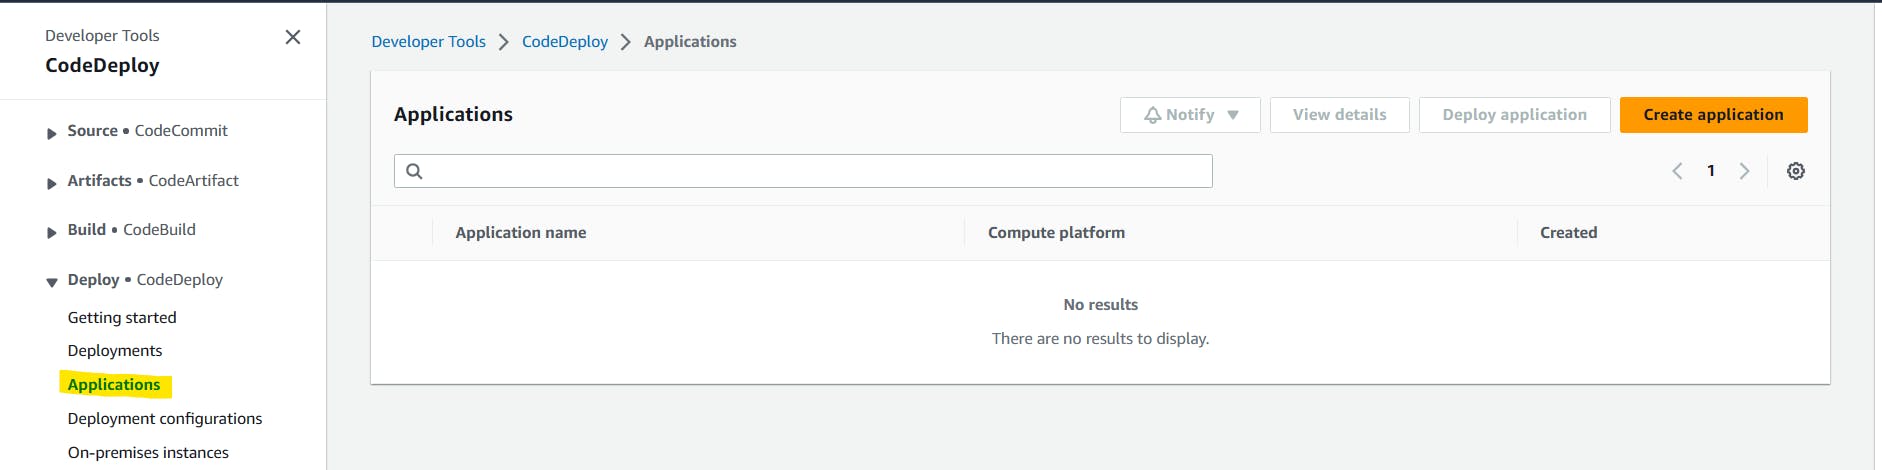
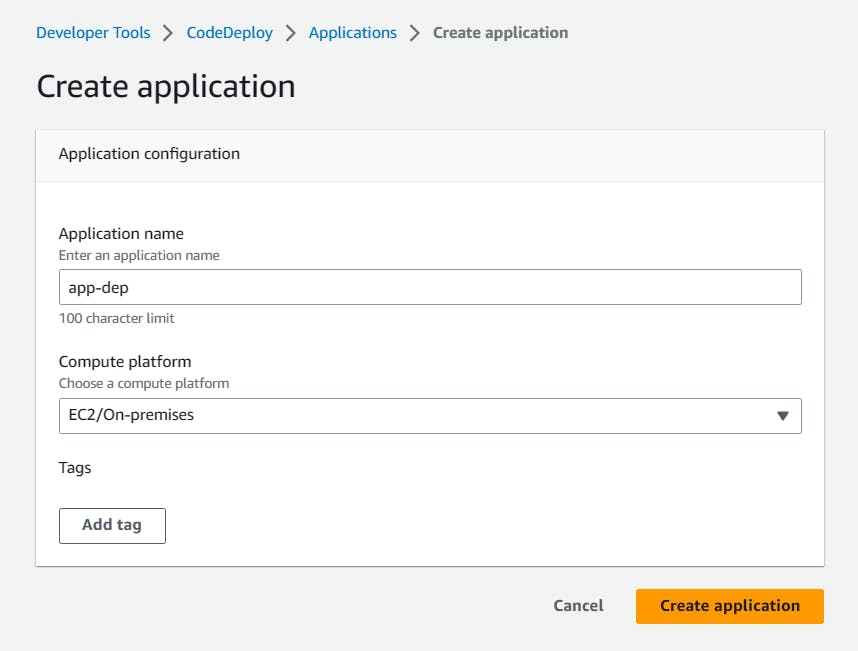
Create a CodeDeploy application
In AWS Management Console search CodeDeploy. Once you are into the CodeDeploy go to Applications which is inside Deploy and click on 'Create application'.
Select compute platform 'EC2/on premises' and click on 'Create application'.
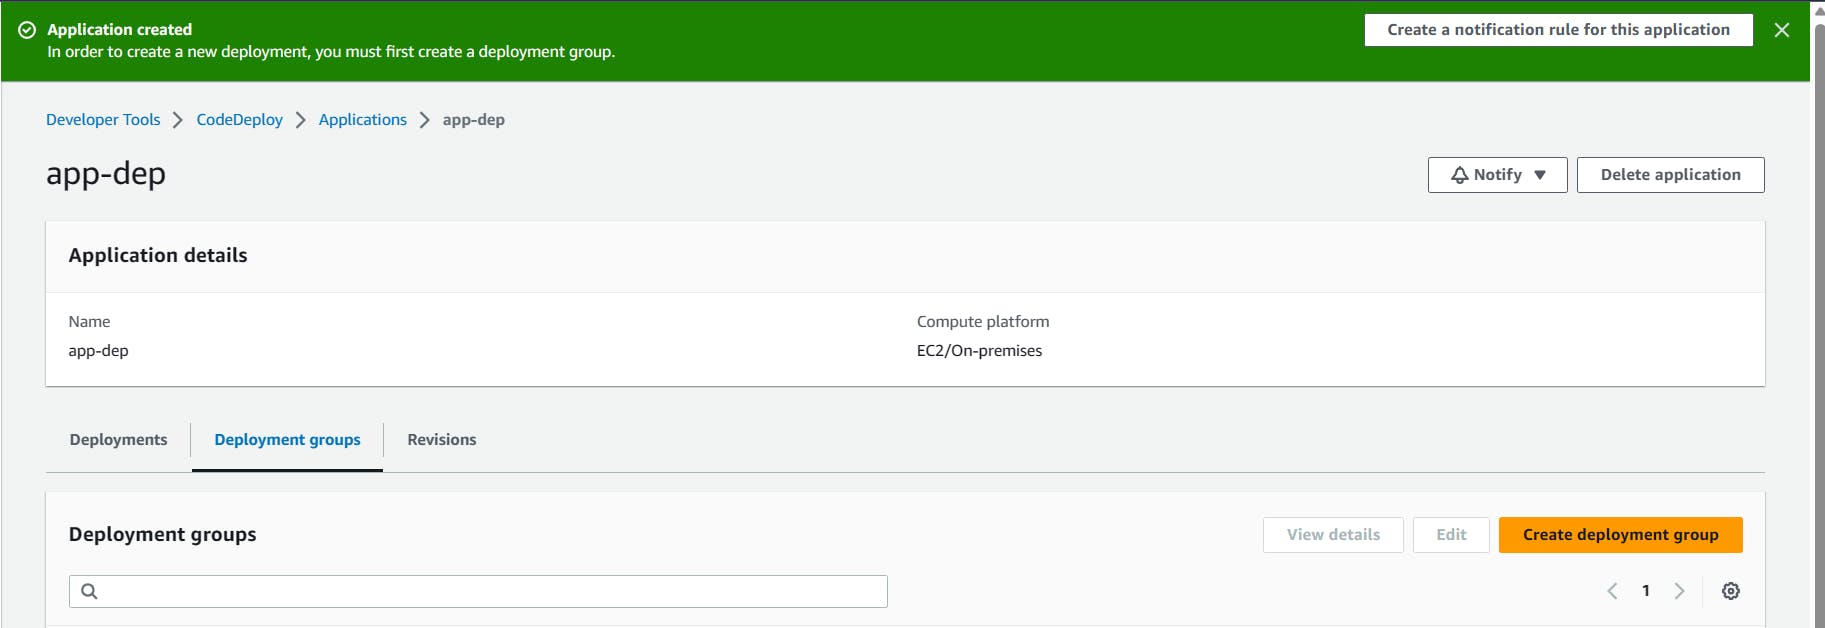
The application is successfully created.
Create a new service role for enabling communication between code deploy and other AWS services.
Go to IAM service and create 'code-deploy-service-role' with permissions.
"AmazoneEC2FullAccess", "AmazoneS3FullAccess", "AWSCodeDeployRole", "AmazoneEC2RoleforAWSCodeDeploy", "AWSCodeDeployFullAccess", "AmazonEC2RoleforAWSCodeDeployLimited".

Change the Trust Relationship
    {
        "Version": "2012-10-17",
        "Statement": [
            {
                "Effect": "Allow",
                "Principal": {
                    "Service": [
                        "codedeploy.amazonaws.com"
                    ]
                },
                "Action": "sts:AssumeRole"
            }
        ]
    }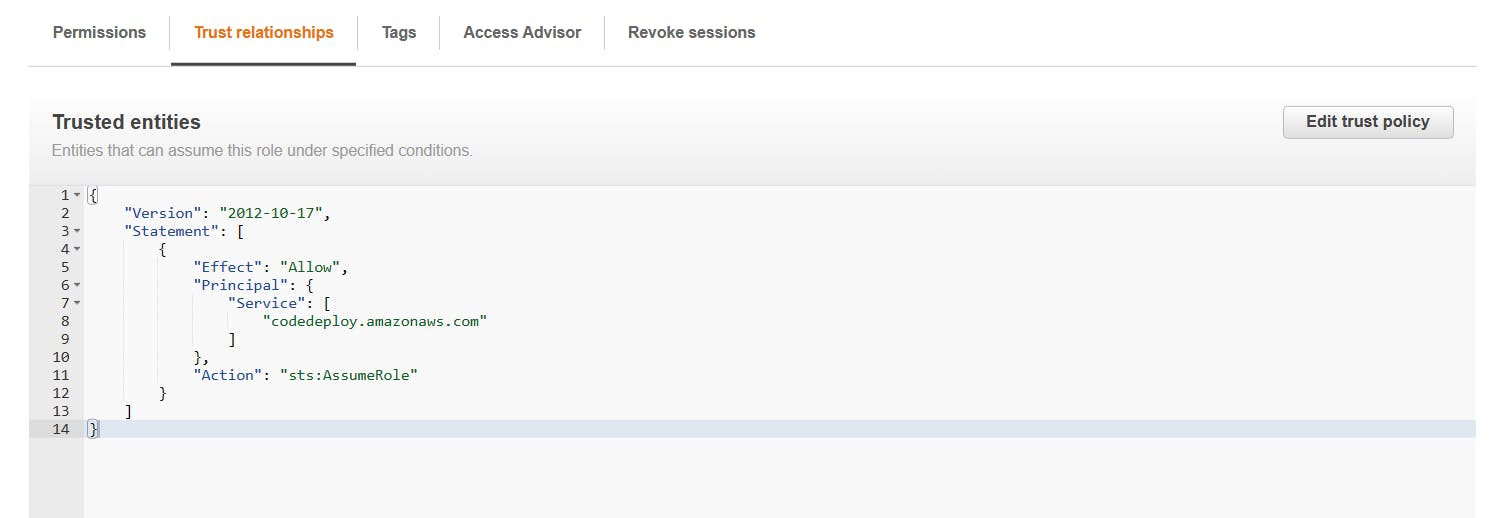
Set up an EC2 instance
You will need to create an EC2 instance on which you want to deploy the index.html file.
Create a Ubuntu EC2 instance

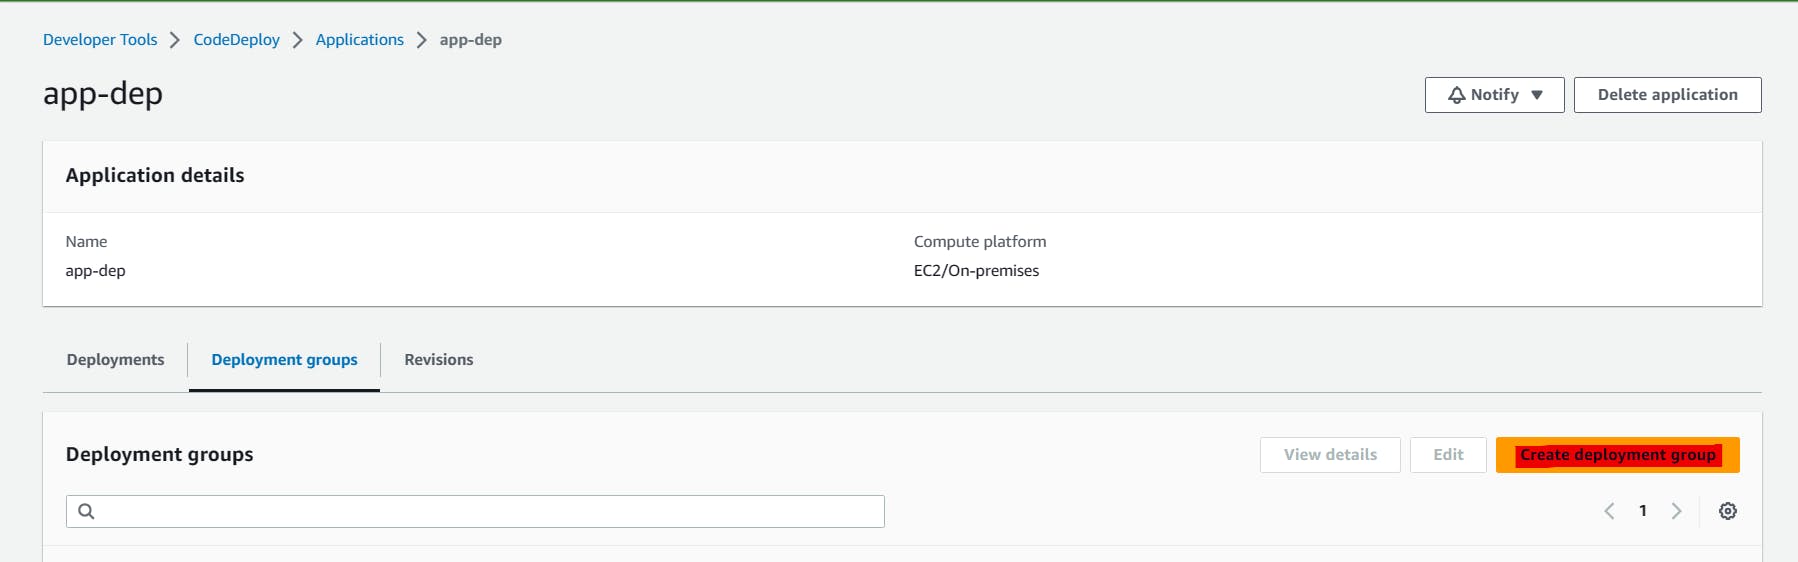
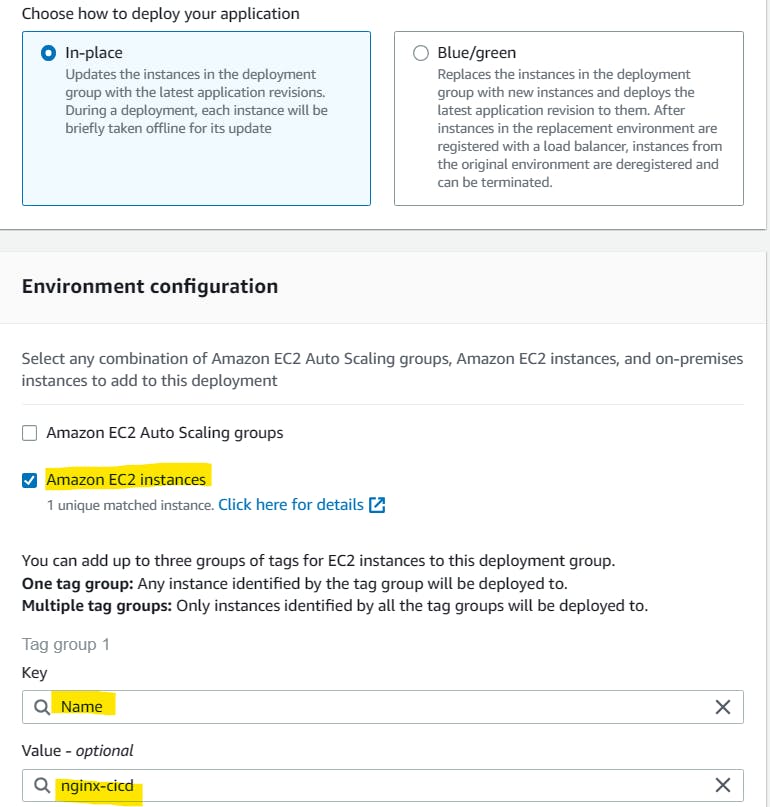
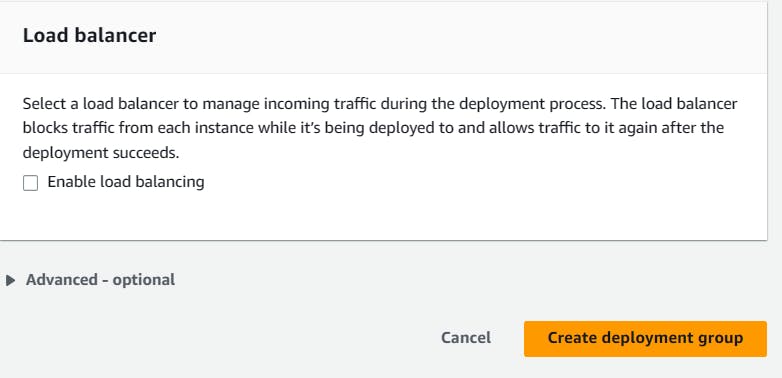
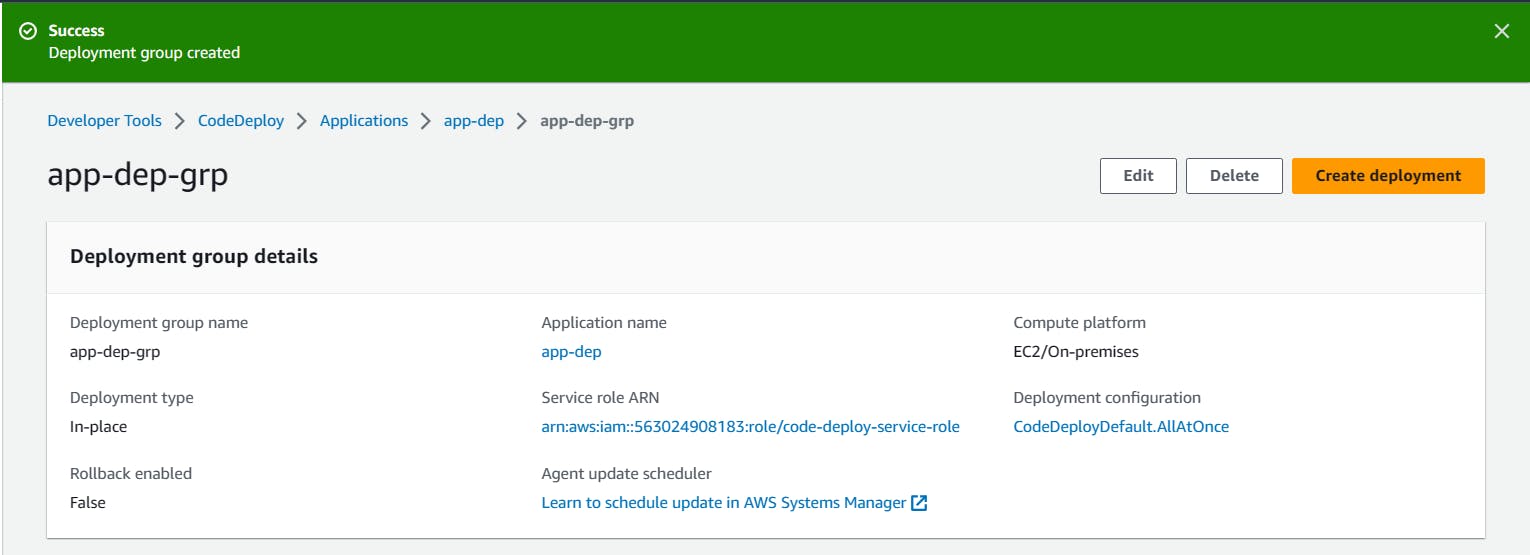
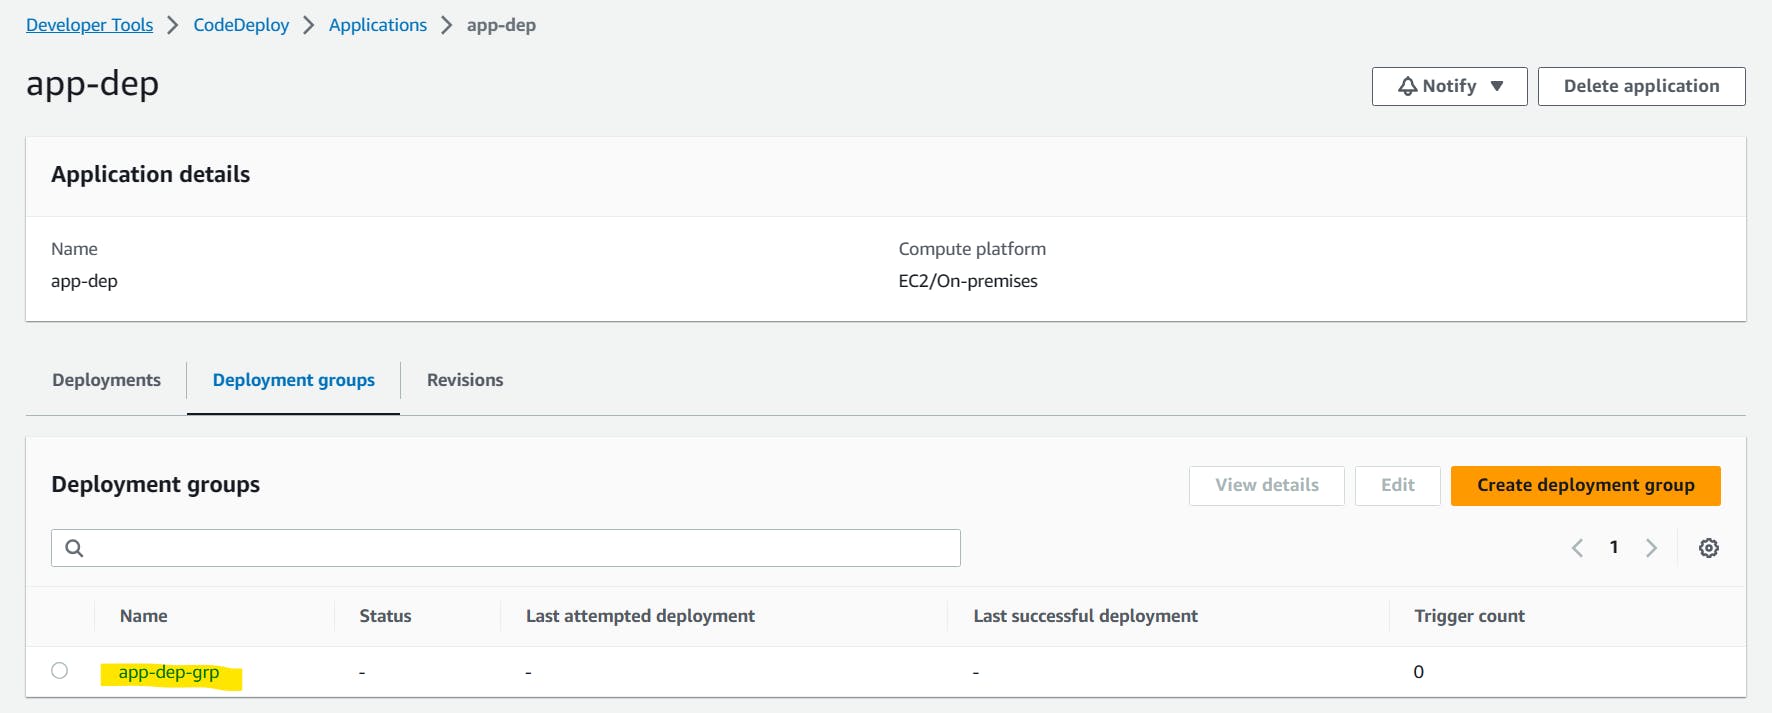
Create a deployment group
Once you have created a CodeDeploy application, you need to create a deployment group. A deployment group is a set of EC2 instances where you want to deploy your application.
Add a deployment group name and choose the Service role where we provide all the permission policies.

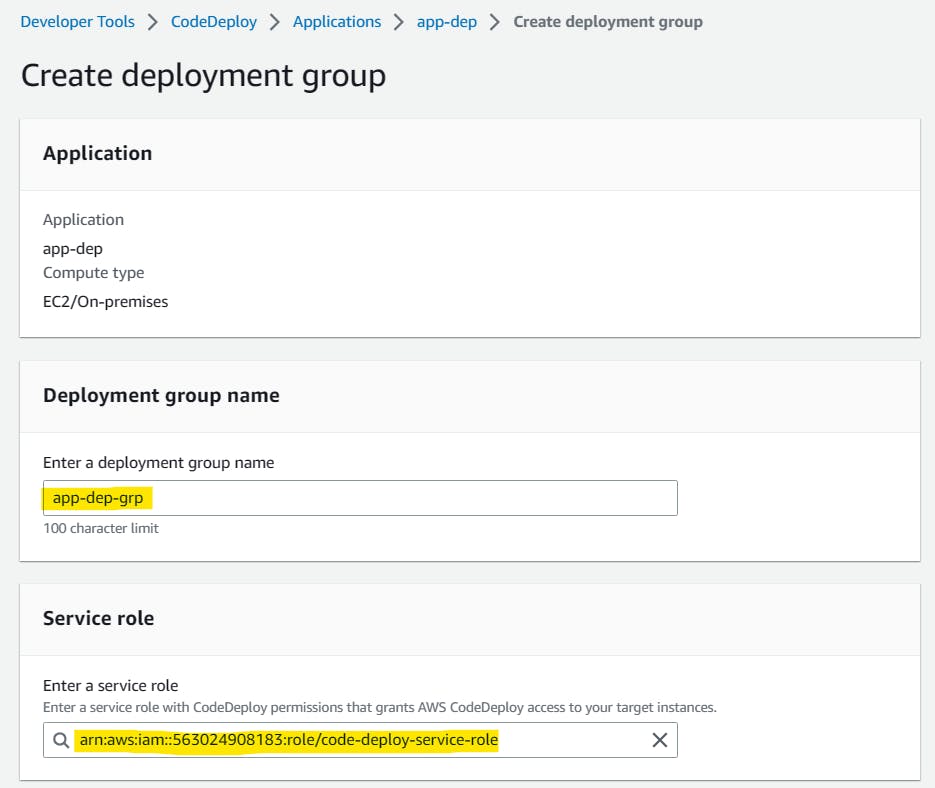
Provide the EC2 instance name that was created before.
Click on 'Create deployment group'.
A deployment group is created.
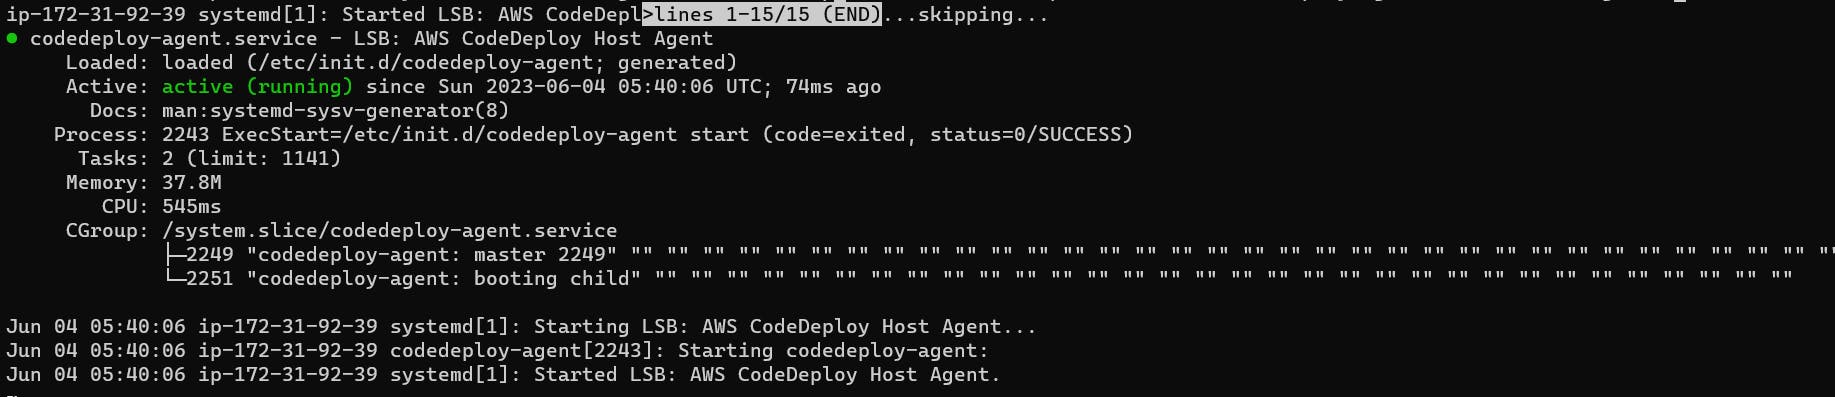
Setup a CodeDeploy agent to deploy code on EC2
Install the CodeDeploy agent:
You need to install the CodeDeploy agent on your Ubuntu EC2 instance. The CodeDeploy agent is a software package that runs on your instance and interacts with CodeDeploy to deploy your application.
You can install the CodeDeploy agent by running the following script on your EC2 instance:
      #!/bin/bash
      # This installs the CodeDeploy agent and its prerequisites on Ubuntu 22.04.
      sudo apt-get update
      sudo apt-get install ruby-full ruby-webrick wget -y
      cd /tmp
      wget https://aws-codedeploy-us-east-1.s3.us-east-1.amazonaws.com/releases/codedeploy-agent_1.3.2-1902_all.deb
      mkdir codedeploy-agent_1.3.2-1902_ubuntu22
      dpkg-deb -R codedeploy-agent_1.3.2-1902_all.deb codedeploy-agent_1.3.2-1902_ubuntu22
      sed 's/Depends:.*/Depends:ruby3.0/' -i ./codedeploy-agent_1.3.2-1902_ubuntu22/DEBIAN/control
      dpkg-deb -b codedeploy-agent_1.3.2-1902_ubuntu22/
      sudo dpkg -i codedeploy-agent_1.3.2-1902_ubuntu22.deb
      systemctl list-units --type=service | grep codedeploy
      sudo service codedeploy-agent status
Run the script using bash command.

We can verify the status that Code Agent is running.
Create an index.html file:

Task-02 :
Create an appspec.yaml file:
You need to create an appspec.yaml file that tells CodeDeploy what to do with your application.
Here is an appspec.yaml file that deploys the index.html file on nginx. also, create 2 scripts for installing nginx and starting nginx.
        version: 0.0
        os: linux
        files:
          - source: /
            destination: /var/www/html
        hooks:
          AfterInstall:
            - location: scripts/install_nginx.sh
              timeout: 300
              runas: root
          ApplicationStart:
            - location: scripts/start_nginx.sh
              timeout: 300
              runas: root
- Create start_nginx.sh in the scripts folder
    #!/bin/bash

    sudo service nginx start
- Create install_nginx.sh in the scripts folder
    #!/bin/bash

    sudo apt-get update
    sudo apt-get install nginx -y
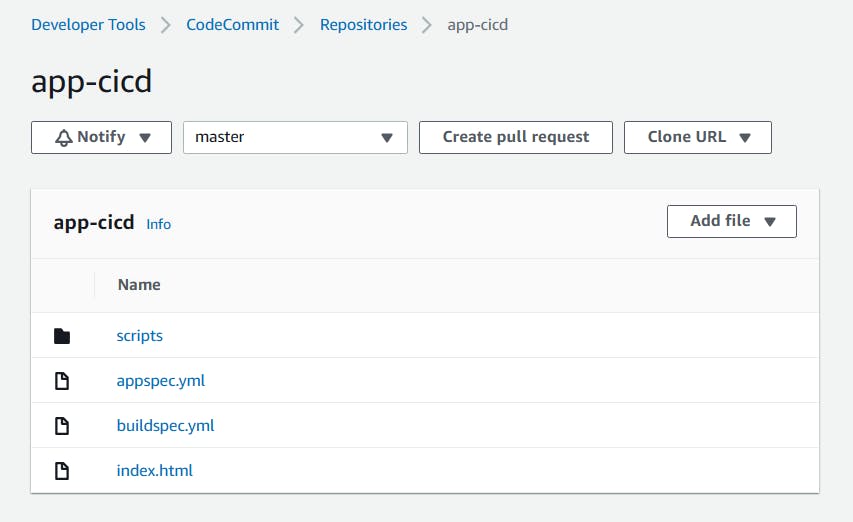
Push all the files to code commit using 'git add' and 'git commit' commands.
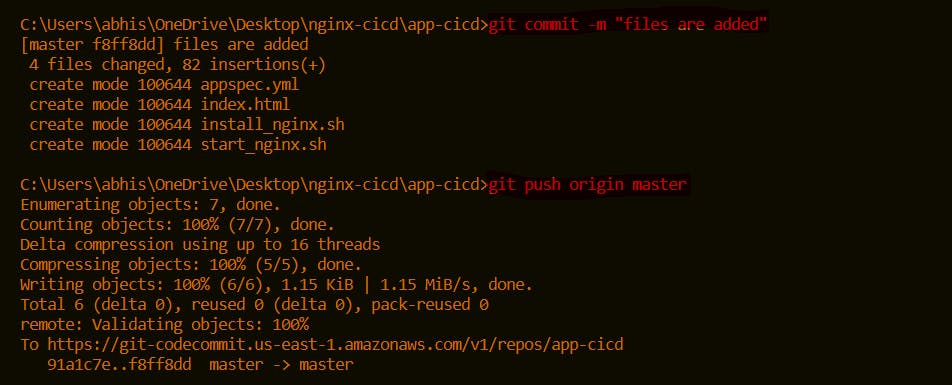
All the files are updated in the CodeCommit.
Add changes to the buildspec.yml file
    version: 0.2

    phases:
      install:
        commands:
          - echo Installing NGINX
          - sudo apt-get update
          - sudo apt-get install nginx -y
      build:
        commands:
          - echo Build started on 'date'
          - cp index.html /var/www/html/
      post_build:
        commands:
          - echo Configuring NGINX

    artifacts:
        files:
          - '**/*'
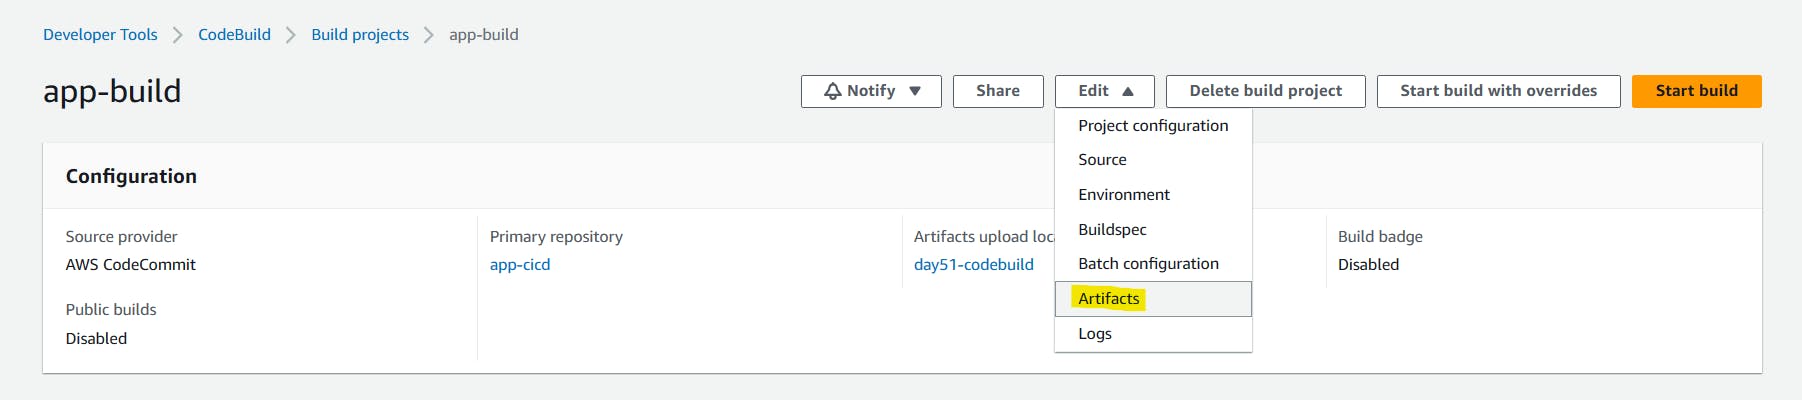
In build projects, Edit and choose 'Artifacts'.
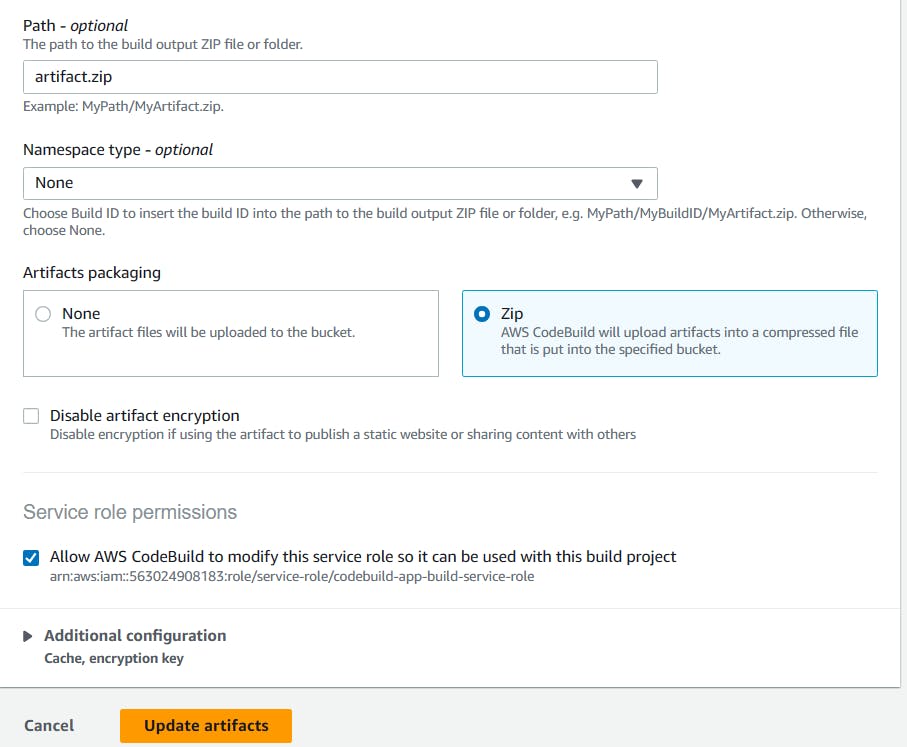
Create a new S3 bucket.
In Artifacts, select artifact type as Amazon S3 and choose bucket name.

Click on 'Update artifacts'.
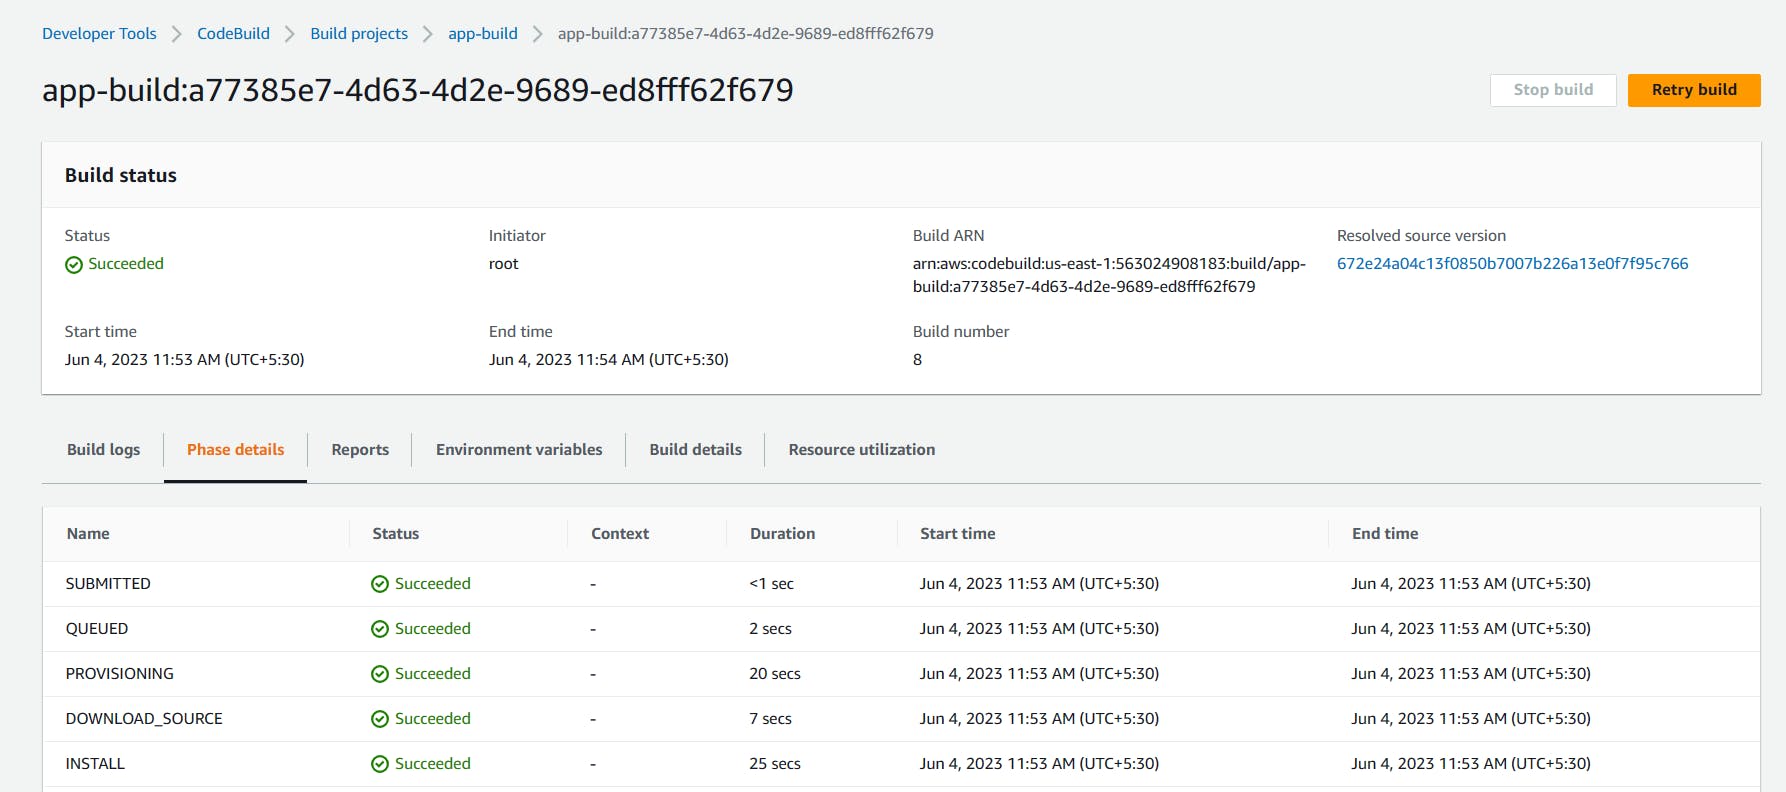
Artifact upload location successfully added. Click on 'Start build'.

The build is Succeeded.
After building completion, go to the S3 bucket and copy the S3 URL of the nginx_app-dep zip file.


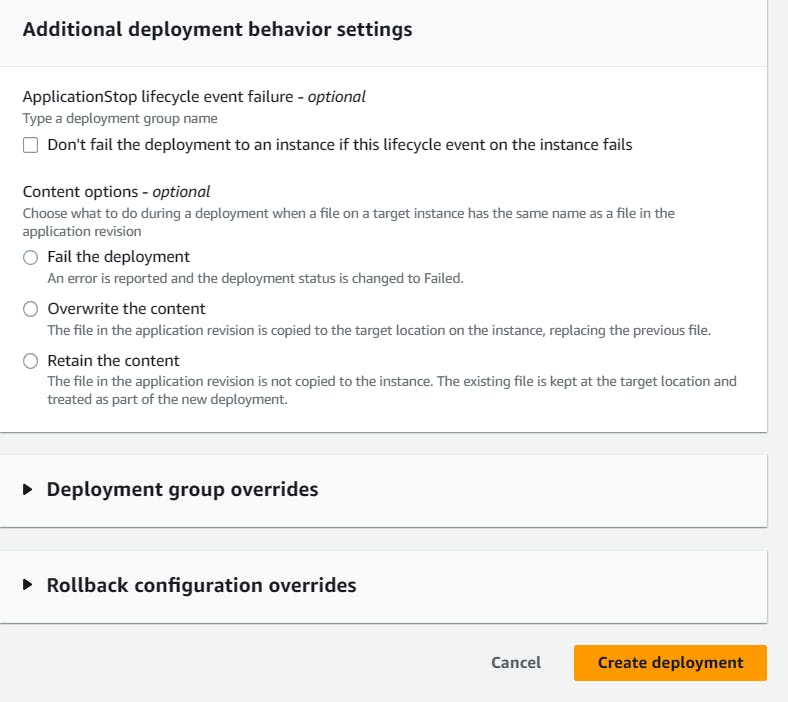
Create deployment:
In the Application, Go to Deployments and click on 'Create deployment'
In revision type, select Amazon S3 and paste the above copied S3 url to the revision location

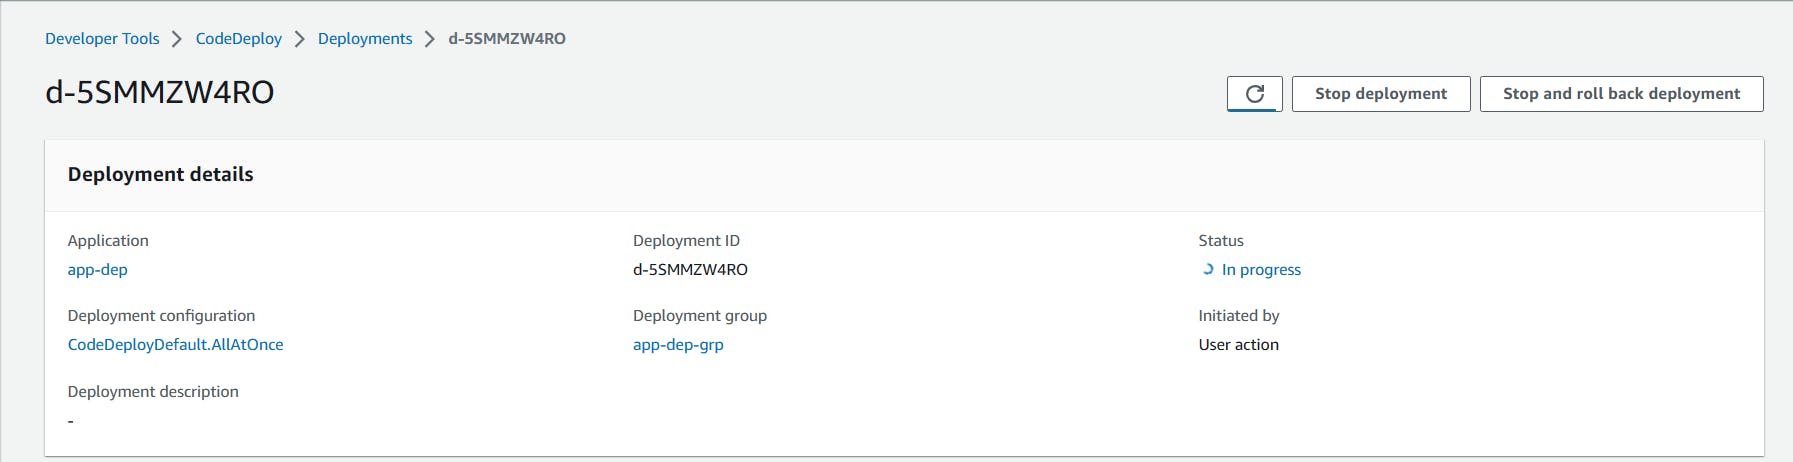
Click on 'Create deployment'.
Deployment is created. but events are in a pending state.
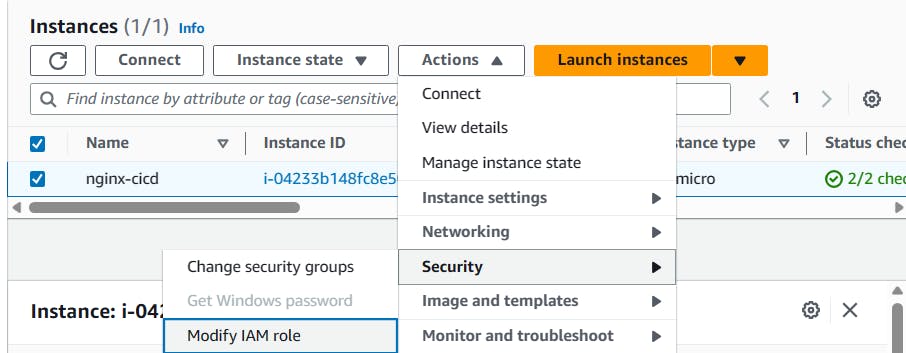
EC2 doesn't have any role policy to retrieve the data from S3 to CodeDeploy.
To create a new service role for enabling communication between EC2 and S3, code deploy.
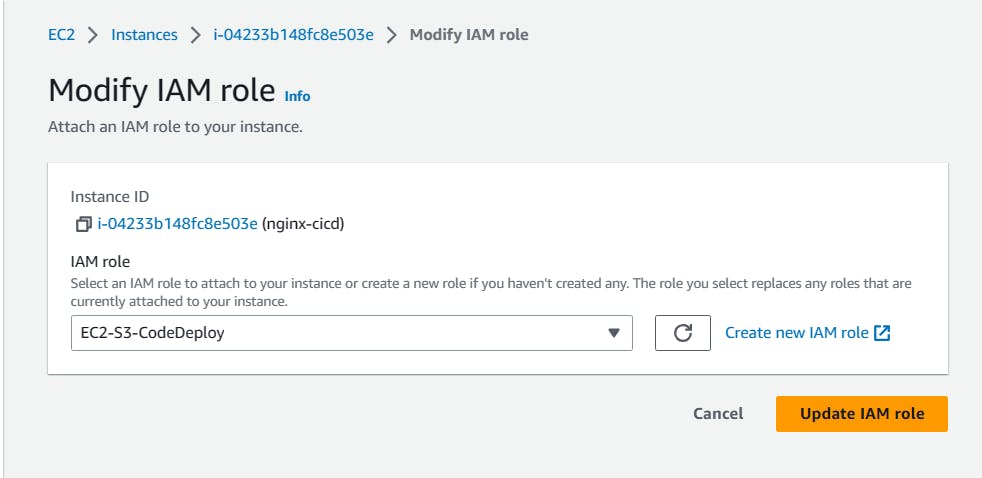
Go to IAM service and create 'EC2-S3-CodeDeploy' with permissions.
"AmazoneEC2FullAccess", "AmazoneS3FullAccess", "AWSCodeDeployFullAccess".

Attach that service role to the EC2 instance.
Select EC2 instance, In actions, go to security and click on 'Modify IAM role'.
Select the service role that we created in the above steps.
After updating the IAM role, restart the code-deploy agent.
    sudo service codedeploy-agent restart
    sudo service codedeploy-agent status
Deployment status is Succeeded.
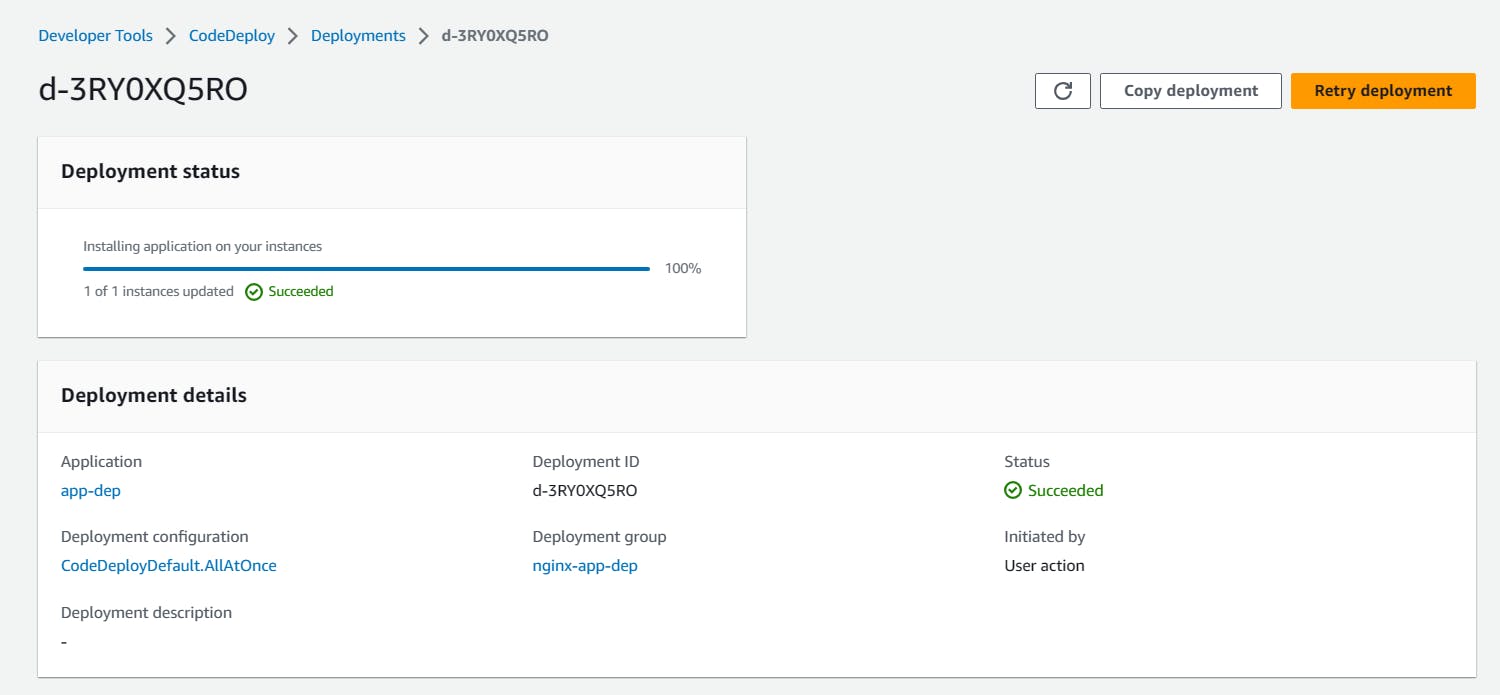
All events Succeeded.

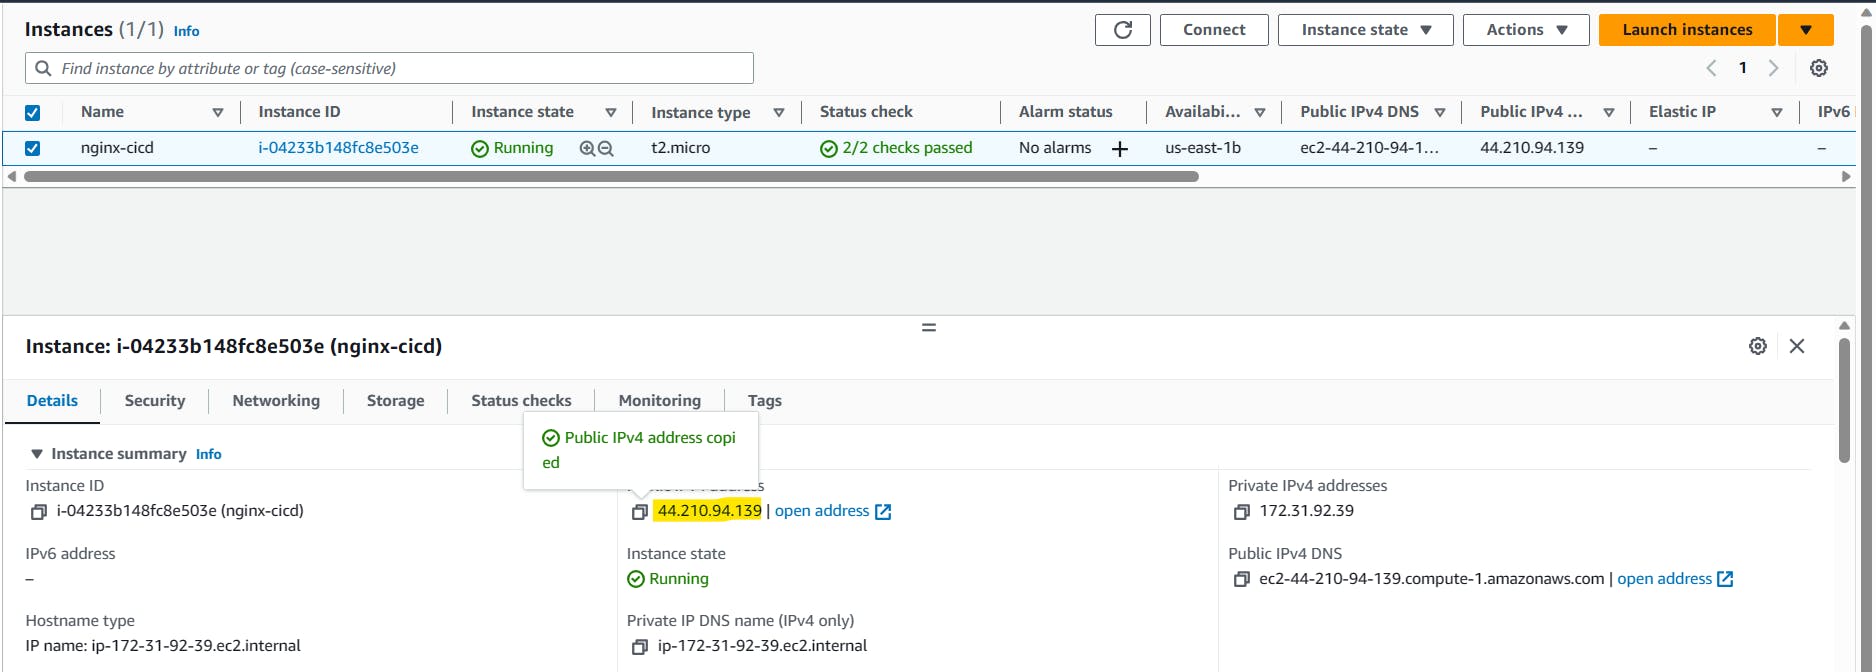
Browse the instance public IP address, it will show the output of the index.html file.

Stay tuned for our next blog post, where we'll explore CodePipeline and its integration into your CI/CD workflow. We're excited to guide you through this journey to master CI/CD on AWS! 🌟
Keep innovating, keep deploying, and embrace the power of AWS! 🚀 ☁


